


BACKGROUND
Azure functions are an ideal way to write discrete pieces of code in the cloud without concerning yourself with the machine and infrastructure that will support them. Azure functions also offer a variety of different development language choices, including C#, Python, PHP, Node.js, and F#.
Furthermore, Azure functions are able to run inside the Azure Compute Stack’s “Consumption Hosting Plan”, which means that you only get charged for the amount of time the code executes. They also support NuGet and NPM Package Management, so you still have access to all of your favorite templates and libraries.
Additionally, they come with integrated security, so OAuth providers, such as Azure AD, Microsoft Account, Facebook, Google, and Twitter are readily available.
Moreover, you can easily integrate with Azure services and SaaS offerings, including Azure Cosmos DB, Azure Event Hubs, Azure Mobile Apps (tables), Azure Notification Hubs, Azure Service Bus, Azure Storage, GitHub (through webhooks), on-prem (using Service Bus), Twilio (SMS messages).
In addition to this, you can code your functions right inside the Azure portal, which I’ll do in my example, and you can even setup continuous integration and deploy your code through VSTS and GitHub (and others).
In the following step-by-step example, I’ll create my very first Azure function. If you’re new to this like I am, then perhaps you can create your very first Azure function together with me? In any case, here we go…
STEP 1
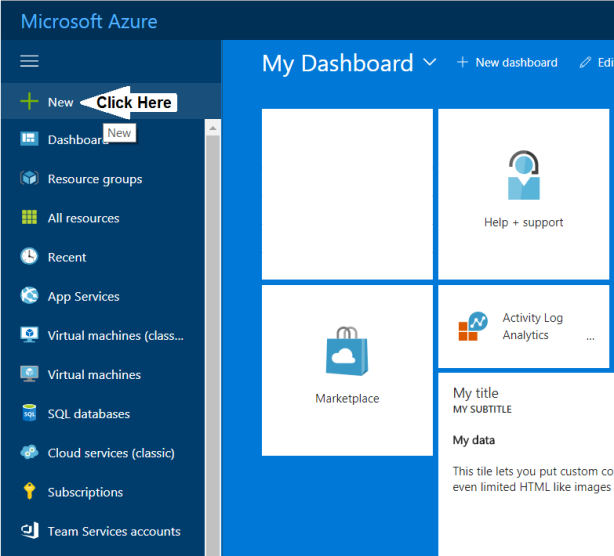
The first step is to login to your Microsoft Azure Portal account. Once you’ve successfully done this, then click “New” on the left navigation bar.
STEP 2
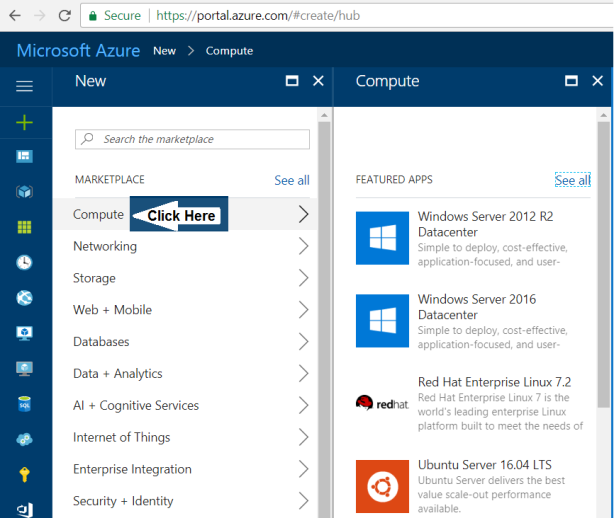
When the “New” menu pops up, click on the “Compute” option in the list.
STEP 3
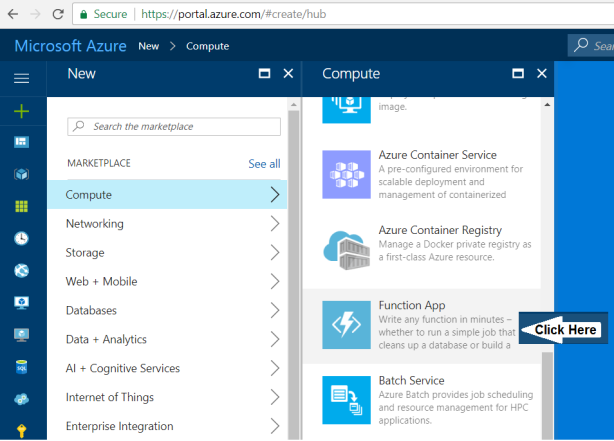
Once you click on the “Compute” item in the Marketplace selections, look for the “Function App” option in the Compute item list.
STEP 4
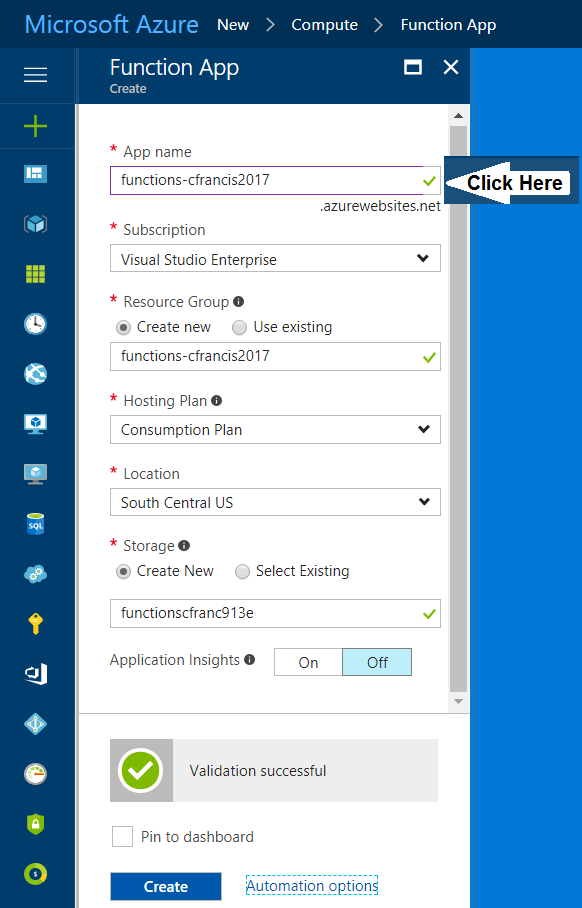
A new “Function App” creation dialogue box will ask you to name your application. I called mine functions-cfrancis2017. You can name your whatever you like.
Also, keep the “Consumption Plan” selected as the “Hosting Plan”. Azure provides two types of pricing in this category, including the Consumption Plan and the App Service Plan. Here’s the difference between the two:
- Consumption plan – When your function runs, Azure provides all of the necessary computational resources. You don’t have to worry about resource management, and you only pay for the time that your code runs.
- App Service plan – Run your functions just like your web, mobile, and API apps. When you are already using App Service for your other applications, you can run your functions on the same plan at no additional cost.
STEP 5
Once you’re satisfied with the name of your “Function App”, then click the Create button at the bottom of the dialogue box.

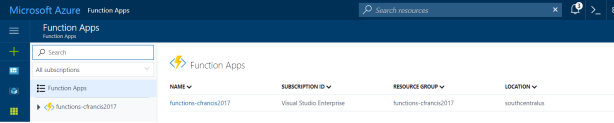
STEP 6
You should now be able to find your new App Service and Storage Account in the Azure Portal.

STEP 7
Clicking on your function allow you to inspect its details. You can even toggle your new Function App as a favorite by clicking on the star next to your new function.

STEP 8
Once you toggle it as your favorite, you can easily find it anytime you look through the Function Apps section of the Azure Portal.
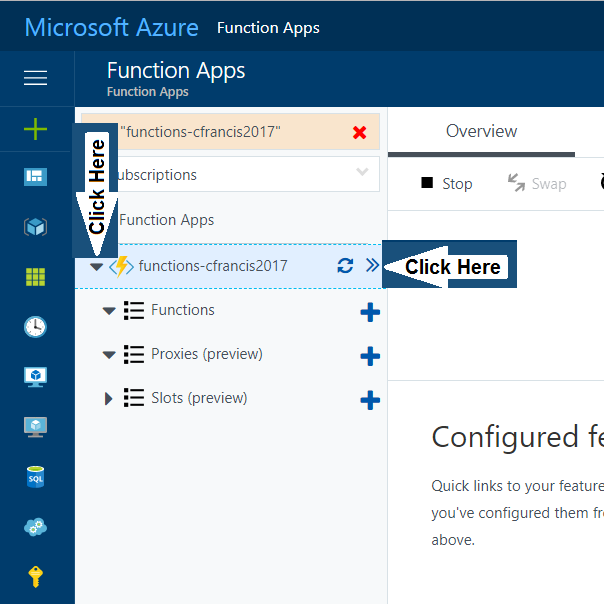
STEP 9
Click on the following items to display more information about your new Function App or to drill down on the type of item you’d like to create under this category.
STEP 10
We want to create a new Azure Function that lives in our new Function App. So, just:
- click on (+) next to the “Function” item.
- Choose the scenario you want. I chose a “Webhook + API”
- Click on the “Create this function” button.

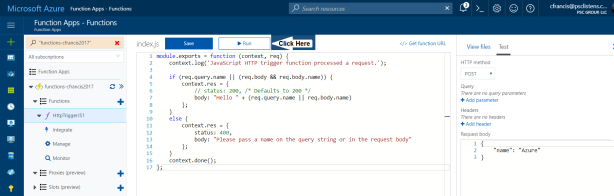
STEP 11
After you click on the “Create this function” in the previous example, the following code block will automatically display in the language you chose. I chose JavaScript as my Webhook.

STEP 12
Click the “Run” button just to try it out. Once you’re satisfied with the results, try running the Azure Function remotely.
STEP 13
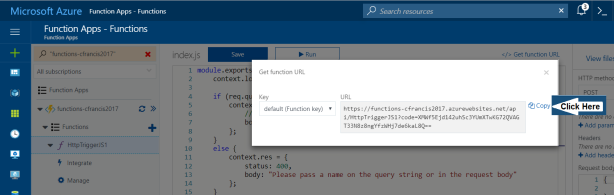
To run it remotely, click on the “</> Get function URL” selection to bring up the Azure Function URL. This is the restful service you will call to execute your new Azure Function.
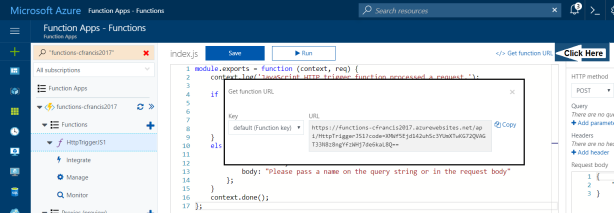
STEP 14
Select the default (Function key) and review the results of the HTTP(S) call.
STEP 15
Do the following:
- Paste the link you just copied into a mainstream browser of your choice.
- Click the “Enter” key to navigate to the URL.
- Review the results. They’re perfect!

STEP 16
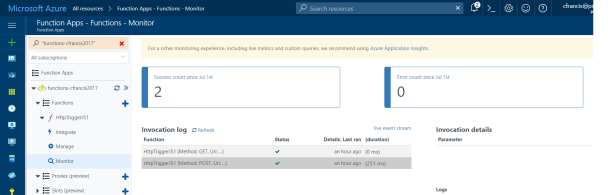
Now you can go back into the Azure Portal and review the results for the calls that you (or anyone else) makes to your new Azure Function.
SUMMARY
From a primitive standpoint, that’s all there is to it. Of course, I’ll provide a more complex implementation of one in a future article.
Hi, I’m Cole Francis, a Solution Architect for The PSC Group in Schaumburg, IL. I’ve been successfully designing, developing, and delivering custom software solutions for an impressive and extensive list of well-branded clients for over twenty years.
Thanks for reading and keep on coding! 😁

